Turning an AI chatbot into a writing companion in an immersive environment.
Designer
Project Overview
ArchPal is UGA’s very own AI Writing Companion. Built to assist students with their writing, ArchPal serves as a sounding board for students throughout the writing process, from planning and ideation to revision and final tweaks. ArchPal differs from AI chatbots as it acts as a supportive writing companion, built to encourage students as they write, not to write for them. The goal of this project was transform the ArchPal UI from a simple chatbot to an immersive environment to get students to enjoy the writing process learn throughout it.
The Problem
Although ArchPal has many different functionalities compared to regular AI chatbots, the existing UI didn’t showcase that. When I used it for the first time, I didn’t understand how it differed from ChatGPT, limiting my knowledge on its capabilities. I knew I wanted to find a way to communicate how the researchers intended students to use it throughout all stages of the writing process.
Additionally, I was tasked to turn the chatbot interface into a companion like experience, making the student feel like they are writing alongside someone. I also wanted to redesign the interface so students could differentiate ArchPal from other chatbots to encourage them to turn to ArchPal for writing help rather than traditional chatbots.
The Why
Students everywhere from middle school to high school have been using AI to help them write their assignments, and sometimes even having the chatbot write them for them. While AI can be a great tool for learning in certain situations, when students offload their assignments to AI they don’t reap the benefits of writing, only the results.
This is where ArchPal comes in. We wanted students to be able to benefit from the capabilities of AI without the ease of having it write their assignments.
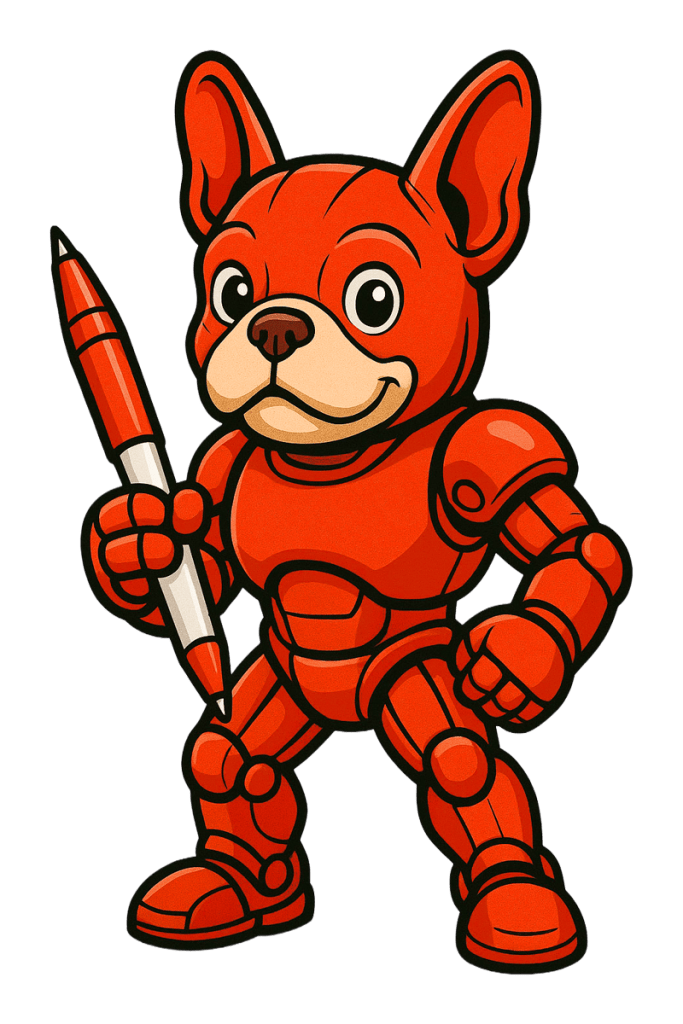
Instead of appearing as a chatbot, we wanted ArchPal to appear as a supportive coach, matching its look to its functionality. ArchPal already has an identifiable mascot called “RoboDawg,” and my job was to create an environment with RoboDawg that simulated working with a writing coach. I also wanted this environment to highlight ArchPal’s capabilities as a writing coach rather than a chatbot, opening students’ eyes up to the different ways it can be used throughout the writing process.
Scope & Constraints
Due to the funding timeline, I worked on this project for only a month. Although I was able to redo the UI in Figma, we still had some trouble integrating it into the project, since our project was coded in Streamlit/python rather than React.
There was some miscommunication about my role in the project, where my engineer wanted me to code my designs using AI, however I didn’t have the skillset or tools to do so, since it was my understanding that I was the designer. Additionally me and my software engineer were on completely different work schedules, where I worked in the morning and he worked at night/weekends, so it was really difficult to coordinate times to meet. As a result, my designs have yet to be implemented but they are all completed in Figma.
The Process
Ideation & Planning
Before I started redesigning this project, I tested out the current prototype. I fed it some of my old writings, and prompted it the same way I would any other LLM, asking for feedback. At first, I didn’t understand how ArchPal was different from any other AI tool. However after I met with my PI’s I learned that ArchPal won’t rewrite or do anything that would infringe on a student’s academic honesty, acting as a digital writing tutor.
I also learned how they intended ArchPal to be used at any stage of the writing process, including planning, brainstorming, rough and final drafts. I had only used LLMs (including ArchPal) to review my writing work, so I knew I wanted to communicate to students ArchPals many use cases beyond revision.
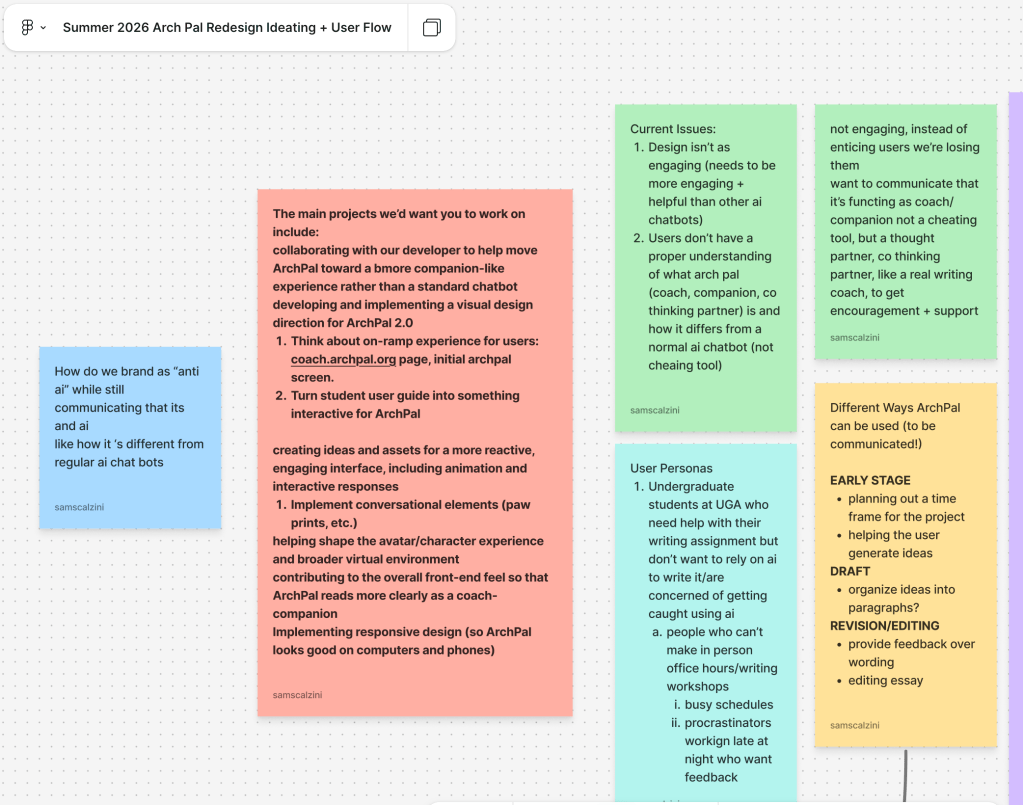
To start, I made a FigJam outlining all of these thoughts. I identified what issues the PI’s had with the current design, and the different use cases of ArchPal. I also identified what I wanted to communicate to students regarding ArchPal’s functionality, so they wouldn’t mistake it for an ordinary chatbot like I did so they can understand how it differed from a chatbot and could benefit their writing.
Low Fidelity Prototype
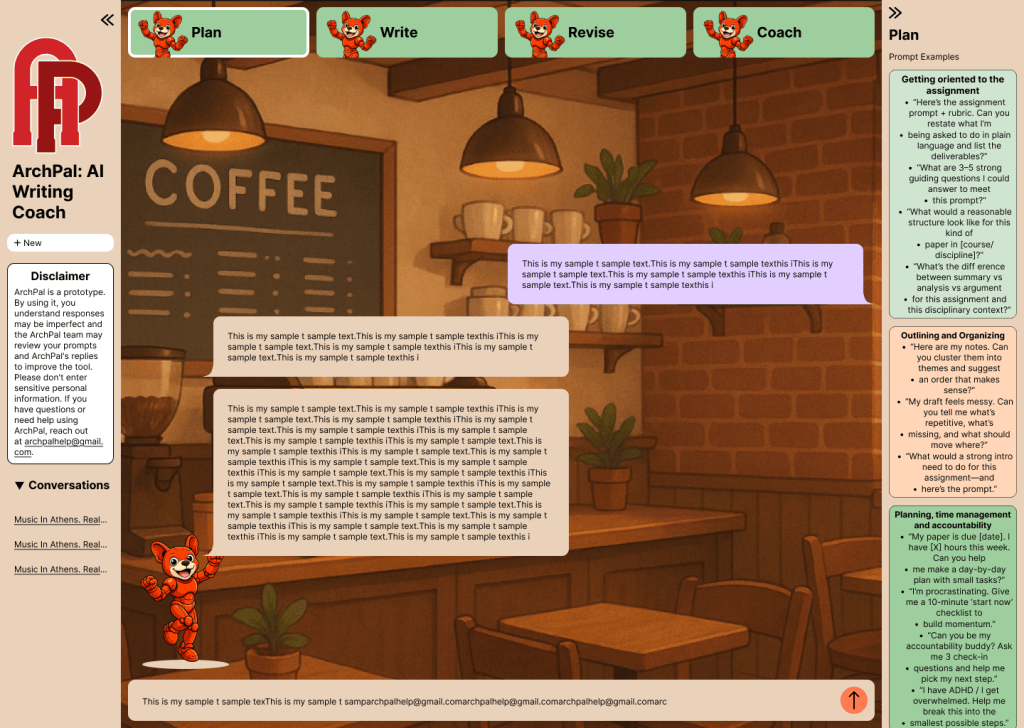
Since we already had our mascot and backgrounds for the project, I had to figure out how to put them together to create an immersive experience. I started off by sketching my ideas out of where RoboDawg could fit into the interface design. I took inspiration from a Pomodoro study environment app I use for the immersive experience. I tried to maintain similar design principles to existing chatbots, so users could feel comfortable using the new software.
The hardest part of this initial process was figuring out how to introduce students to the different prompts they could use ArchPal for. I grouped them into 4 categories, with accompanying pop ups on the top of the environment, that opened another sidebar with matching prompts for that given category.
Further Iteration and Improvement
On this project, I was fortunate enough to meet with an experienced graphic designer and UX professional. I showed her my designs, and she gave me a lot of feedback on them. She told me that with this design, the screen was too cluttered, especially since we were going for a more immersive environment. Additionally the scale of ArchPal doesn’t match the scale of the background, which takes away from the immersion, so I started to experiment with a larger ArchPal in more iterations.
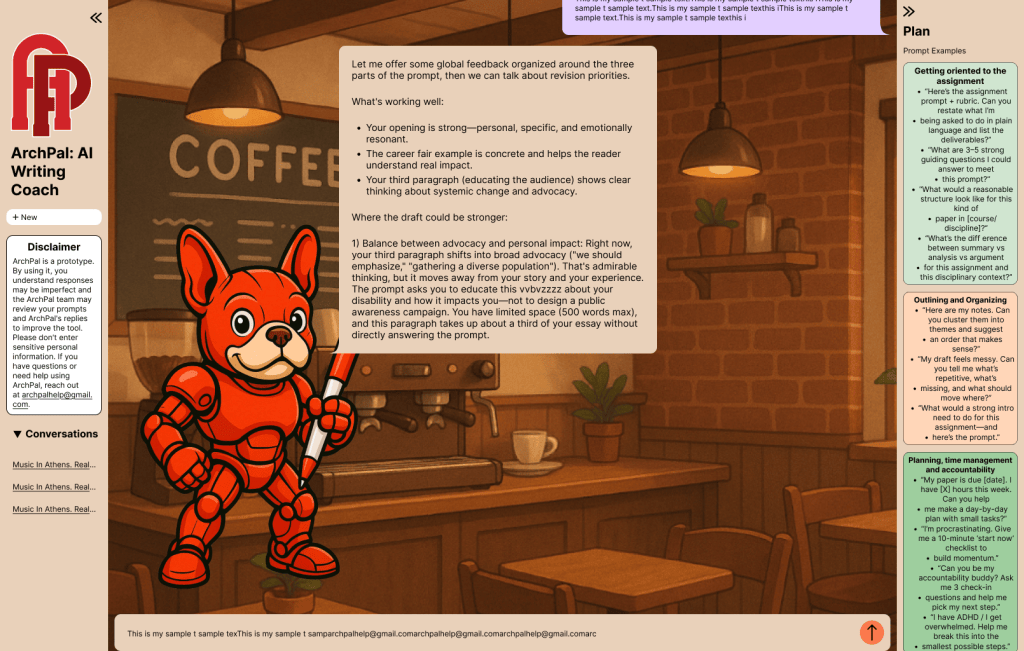
She also mentioned that the disclaimer being constantly visible was unnecessary, which I agreed with. I had only included it because my PI’s wanted it there. Later, when I showed them an alternative design where the user has to click to open the disclaimer, they agreed that it looked better too. I learned how important it was to go with your gut as a designer, and showing your bosses your designs and explaining your decisions, rather than taking everything they want in the design literally.
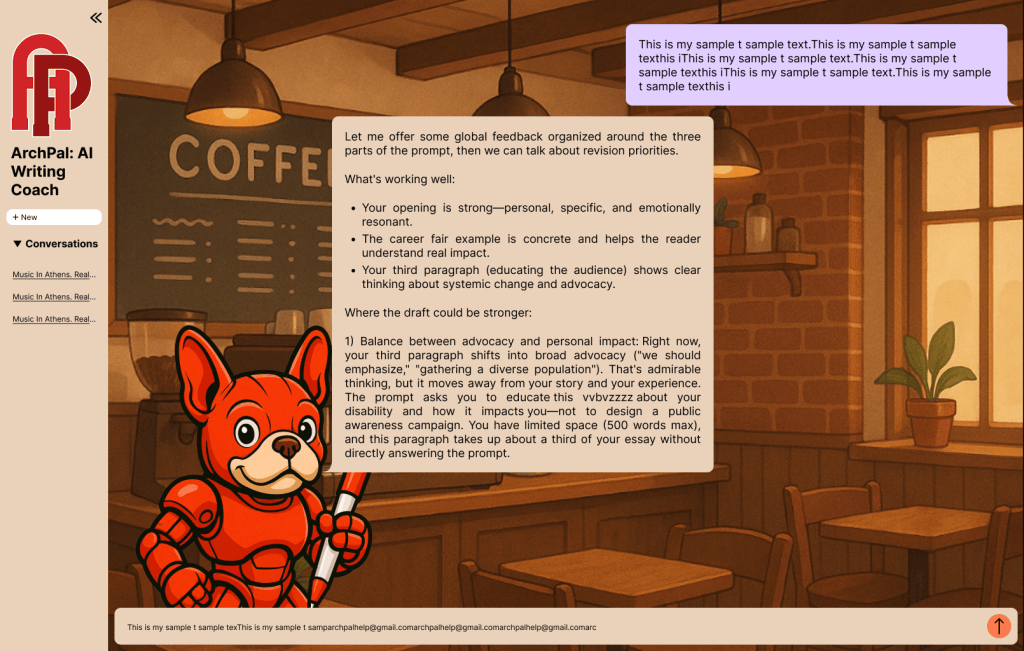
Finalized Main Design – High Fidelity
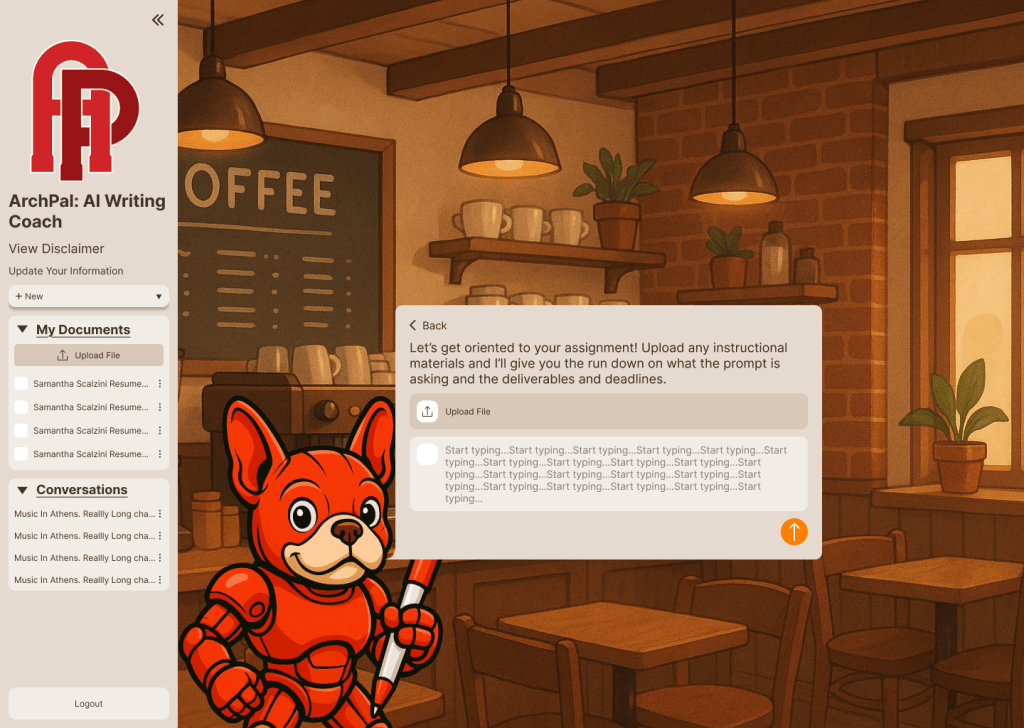
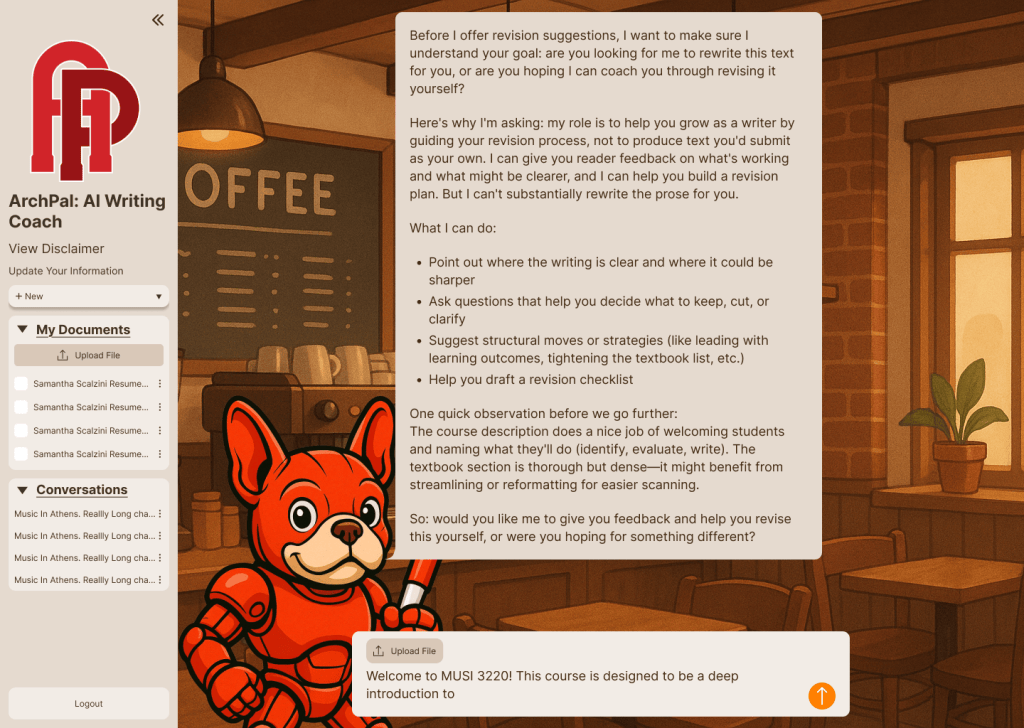
For the final design, I culminated all of my feedback and new features into a high fidelity prototype.
The graphic designer and I created a color scheme, which I incorporated using Figma Variables. I also updated the size of the chat boxes to fit 50-70 characters per line for readability.
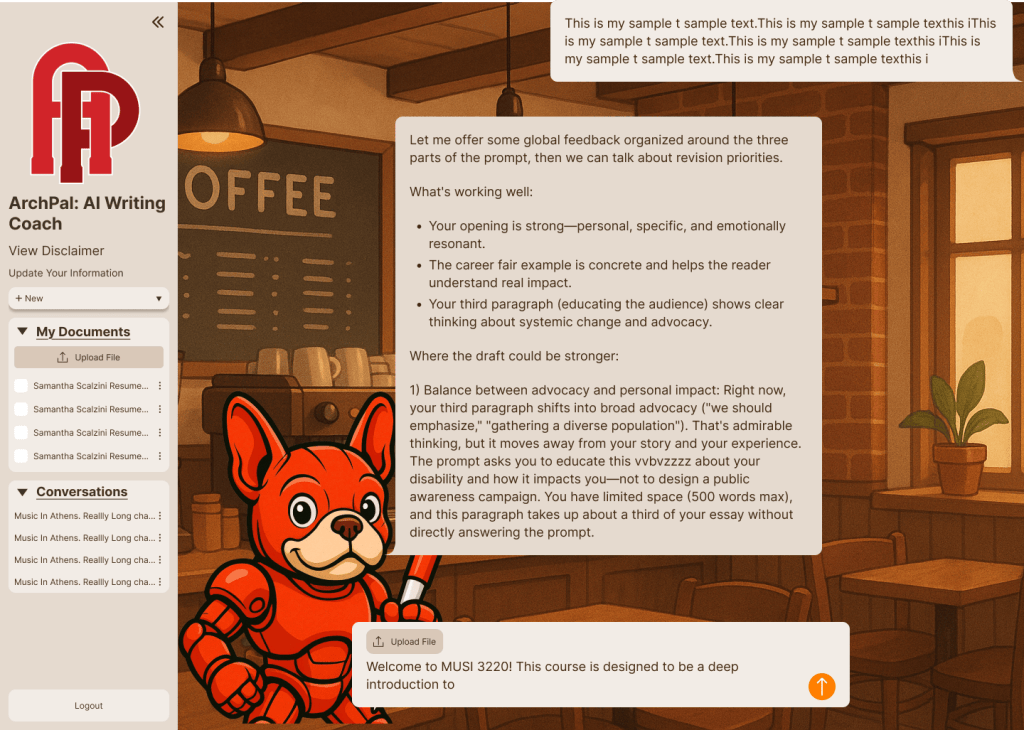
Onboarding Feature
One of the main goals of the project was communicating to our users on how to best use Arch Pal to complete their assignments, distinguishing it from any other chatbot. I initially implemented this idea in a right side bar with example prompts, but it was too busy for people to understand.
Instead my team lead and I prototyped an onboarding form at the start of each chat, where the user could select what they wanted to accomplish with their writing. This lightens the cognitive load for the student, where they can simply select what stage in the writing process they’re at and what they want to accomplish with their chat. Then they can add or write in their assignment instructions, allowing ArchPal to produce an output with little to no input. Of course we added a “something else” option so the studnet didn’t feel constrained, but our hope is that it will trigger the user to think about how they can use ArchPal in all stages of the writing process.
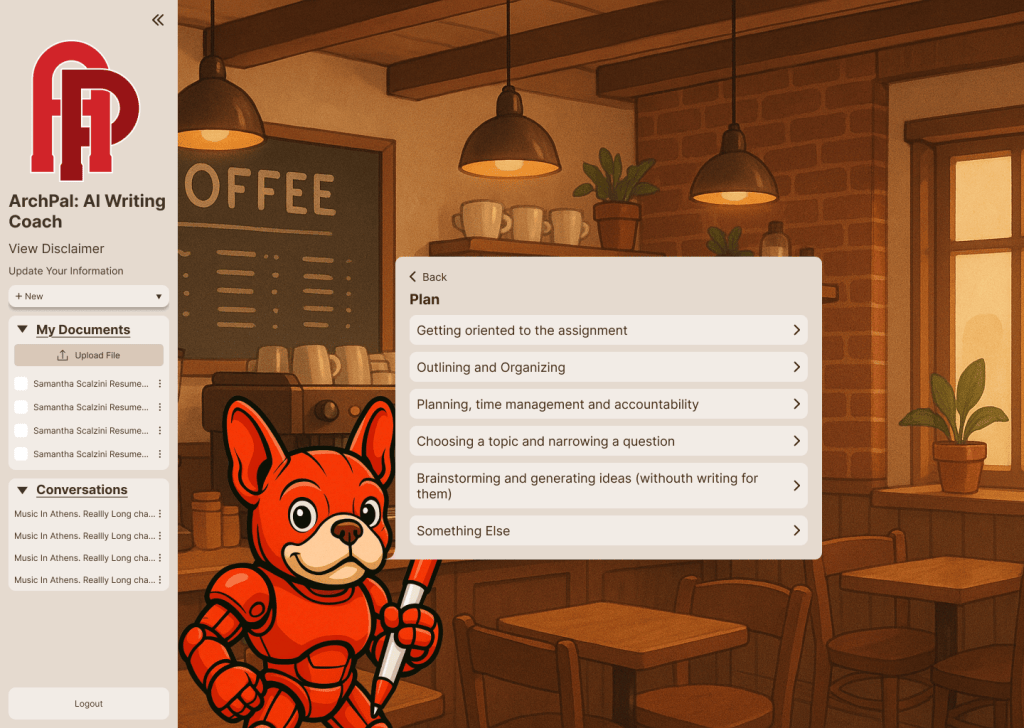
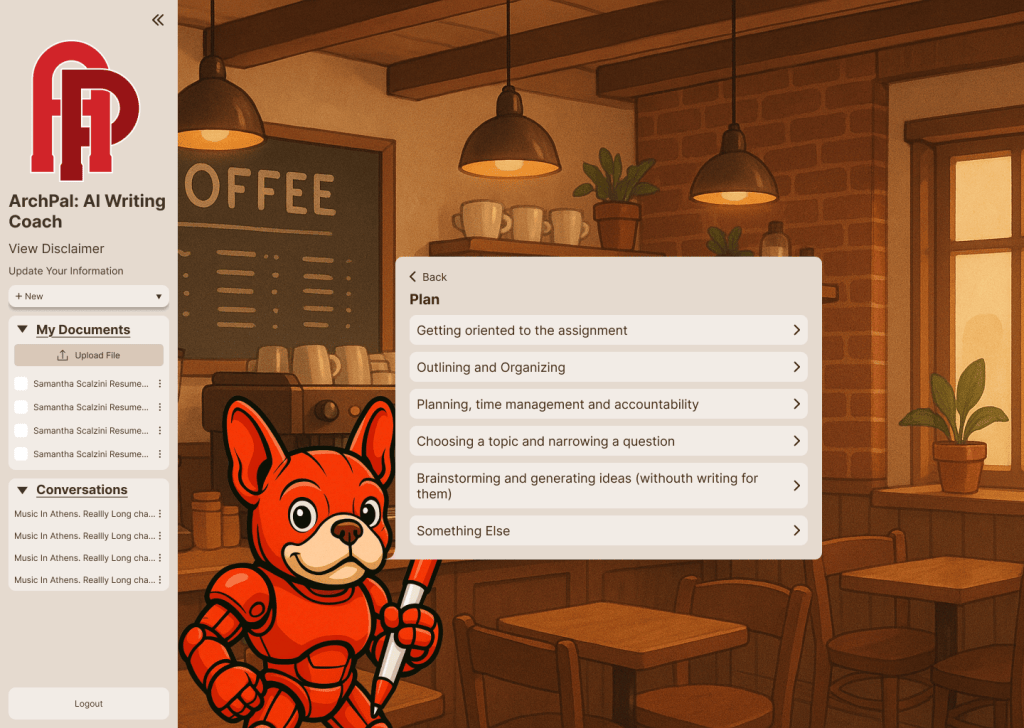
Design System
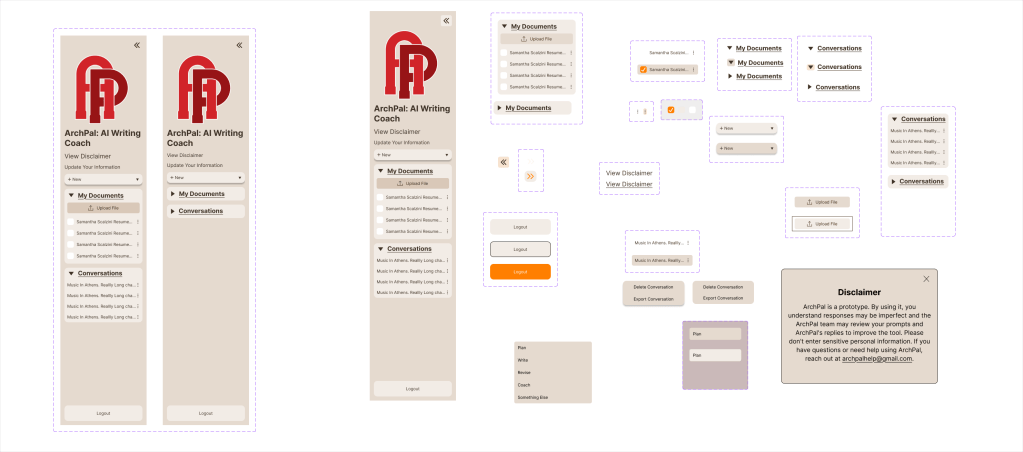
To ensure whoever picks up this project where I left off can easily follow everything, I made a design system in Figma for all of the components. I included variants of each components for hover and selected states. There are also variables for all of the colors, and I learned a lot on how to use Figma’s tools to iterate designs efficiently.
Outcomes & Lessons Learned
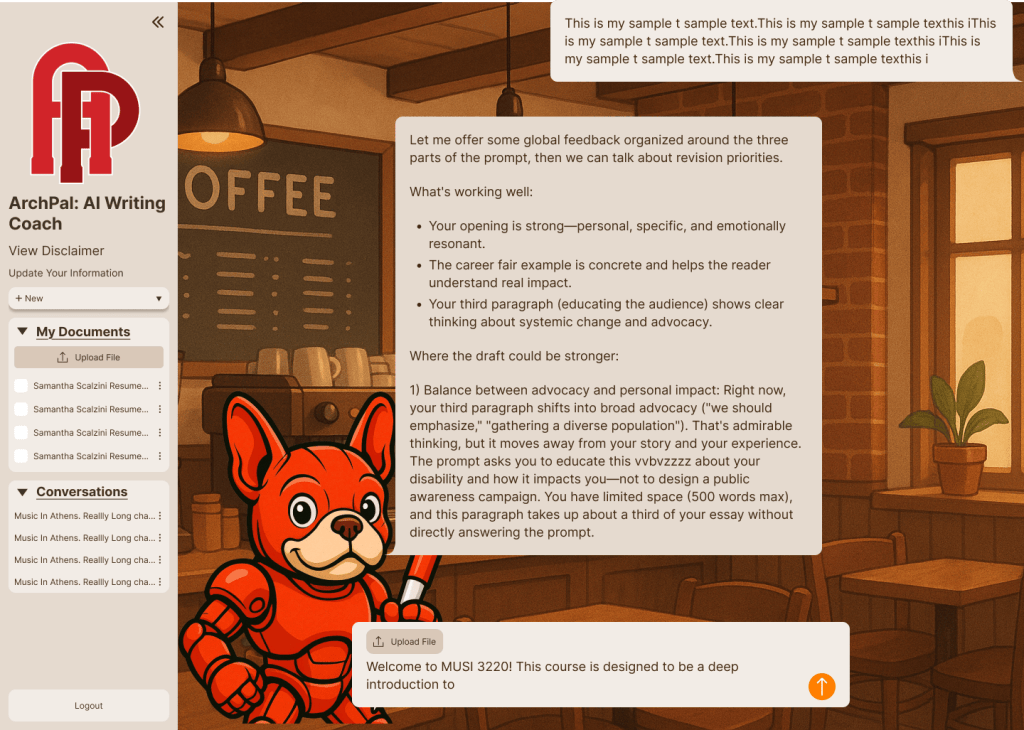
At the end of the project, I completed a high fidelity Figma Mockup of a more immersive companion like ArchPal. I prototyped an onboarding flow for each chat and completed a design system for future members on this project.
This project taught me so much about Figma, design systems, and user experience. Although I’ve worked in the software before, after this project I’m finally proficient in autolayout, components, and variables, and I plan to apply these skills to future projects I work on.
Although I accomplished my goal of redesigning the website to enhance students’ experience, we’ve had trouble coding the designs into the project. Initially we tried to use the Figma MCP server with Claude code for our project, however since the project is coded in Python/Streamlit and not React, the process wasn’t as seamless as we’d hoped. I’d love to learn more about what I can do as a designer to help translate the Figma designs into code.
 Samantha Scalzini